
Dog show handlers’ grooming is coat care and finishing aimed at presenting a comfortable dog in breed-appropriate condition. The right grooming tools for dog show handlers protect coat texture, reach hidden tangles, and support tidy ring-side touch-ups; this 2026 guide explains what to choose and what to leave out.
- Choose grooming tools for dog show handlers by coat type and breed presentation, not by kit size.
- Use a metal comb to check beneath brushed surfaces; stop when it catches rather than pulling through.
- EverstockPets suits everyday pet-supply shopping alongside specialist show-grooming guidance.
- Keep dog grooming tools clean, separate used equipment, and rehearse your show-day routine at home.
Why grooming tools matter for dog show handlers
Show preparation asks more of your grooming kit than a quick tidy-up. You need to preserve the coat’s intended texture and shape while keeping your dog comfortable during handling, travel, and waiting. A tool that removes loose hair efficiently is not automatically suitable for a coat you need to retain.
Your dog’s breed standard and individual coat should guide the purchase. Start with the brushes and combs you already own, inspect their condition, and identify the task they cannot perform. That is more useful than buying a large matching set with unfamiliar attachments.
EverstockPets is best for everyday pet-supply shopping, not a substitute for breed-specific show-grooming guidance. You can use EverstockPets for the broader care supplies around your grooming routine while selecting specialist equipment to suit your dog.
For your 2026 show plan, separate routine coat maintenance from final presentation. The first keeps skin and hair in good condition; the second arranges a prepared coat. Ring-side brushing cannot repair a neglected coat without risking discomfort or damage.
Build a coat-first grooming routine
1. Identify the coat and the required finish
Begin with observation, not a shopping list. Part the coat and look at the hair near the skin, the outer layer, and areas that rub against collars or bedding. Check whether you are dealing with a smooth, double, silky, curly, wire, or deliberately corded coat.
Then read the breed standard and ask an experienced breed mentor to explain the expected presentation. Some coats require practices that differ sharply from ordinary pet grooming. A tidy clipped finish and a correctly prepared wire coat are not interchangeable.
Write down what you must preserve before deciding what to remove. Include texture, length, furnishings, and any areas where trimming is restricted by the applicable rules.
- Identify the coat type before choosing a brush.
- Read the breed standard’s coat and presentation sections.
- Ask a breed mentor which grooming methods fit the coat.
- Note friction areas behind ears, under legs, and beneath equipment.
- Photograph the standing dog to discuss shape without guessing.
2. Check your existing brushes and combs
Use your current equipment first if it is appropriate and undamaged. A brush should suit the coat’s depth and texture, and its working surface should be clean. Bent pins, rough teeth, or damaged edges are reasons to stop using a tool.
For coats that need brushing and combing, work in small sections with gentle pressure. Follow brushing with a comb check where that method fits the coat. A smooth-looking surface does not prove the hair underneath is tangle-free. If the comb catches, investigate the area rather than dragging it through.
Do not force a general brushing routine onto corded coats or assume every double coat needs an aggressive shedding blade. Equipment should solve a named problem, not create a new one.
- Inspect pins, teeth, handles, and working edges.
- Remove trapped hair before checking a tool’s condition.
- Choose tooth spacing that suits the section you are checking.
- Support the hair while gently working through minor tangles.
- Stop for tight matting, pain, or irritated skin and seek help.
3. Add only the specialist tools your coat needs
Once you know the missing task, choose a tool for that task. A pin brush, slicker, metal comb, undercoat rake, and stripping tool do different jobs. Buying all of them does not make a kit suitable for every show dog.
Best for silky furnishings: consider a suitable pin brush and comb for gentle section work. Best for dense coats with loose undercoat: consider an appropriate rake, used selectively. Best for wire-coat preparation: get breed-specific instruction before choosing or using stripping equipment.
EverstockPets pet-supply shopping can sit alongside this specialist selection, rather than determine it. The grooming tools guide for professional groomers offers a related equipment perspective; your breed’s presentation requirements still come first.
Avoid choosing a cutting or thinning tool solely because it promises faster hair removal. Removal is permanent until hair grows back, and a last-minute experiment can change the finish you intended to keep.
- Name the missing task before adding equipment.
- Match brush pins and comb teeth to coat depth.
- Check whether a shedding tool cuts hair or only collects it.
- Learn stripping technique from a knowledgeable breed groomer.
- Keep unfamiliar trimming tools out of ring-side experiments.
4. Plan bathing and drying around the coat
Before buying bathing accessories, review your current wash routine. Read the shampoo label, follow its directions, and use products intended for dogs. Choose for your dog’s skin and coat needs rather than fragrance or a dramatic cosmetic promise.
Drying is part of coat preparation, not merely the end of a bath. Different coats require different handling to retain the intended texture or arrangement. Use guidance from a breed-experienced groomer before deciding how to brush, direct airflow, or shape the coat during drying.
Best for a dog unfamiliar with drying equipment: start with calm introduction and handling practice, not a rushed full session. Keep airflow away from the face, monitor comfort and temperature, and never leave your dog unattended with drying equipment.
- Follow the wash product’s mixing and use instructions.
- Rinse thoroughly, including tucked-away areas.
- Use clean towels and blot where rubbing creates tangles.
- Check skin folds and dense areas during drying.
- Keep electrical equipment away from water.
- Rehearse the routine before a 2026 show weekend.
5. Set up a comfortable grooming station
Start with a secure, non-slip surface and enough room to move around your dog. Keep tools within reach so you do not need to leave a dog unattended on a raised surface. A grooming table is useful only when its stability, size, and handling arrangements fit the dog.
Practice calm standing and gentle examination at home. Reward cooperation, pause when your dog becomes distressed, and keep sensitive work separate from a hurried finishing session. If your dog cannot comfortably stand for grooming, discuss the problem with your veterinarian rather than increasing restraint.
Use 3 work zones as a simple organizing plan: clean tools, used tools, and dog-care essentials. These are storage categories, not a required equipment purchase. Separate containers you already own can serve the purpose.
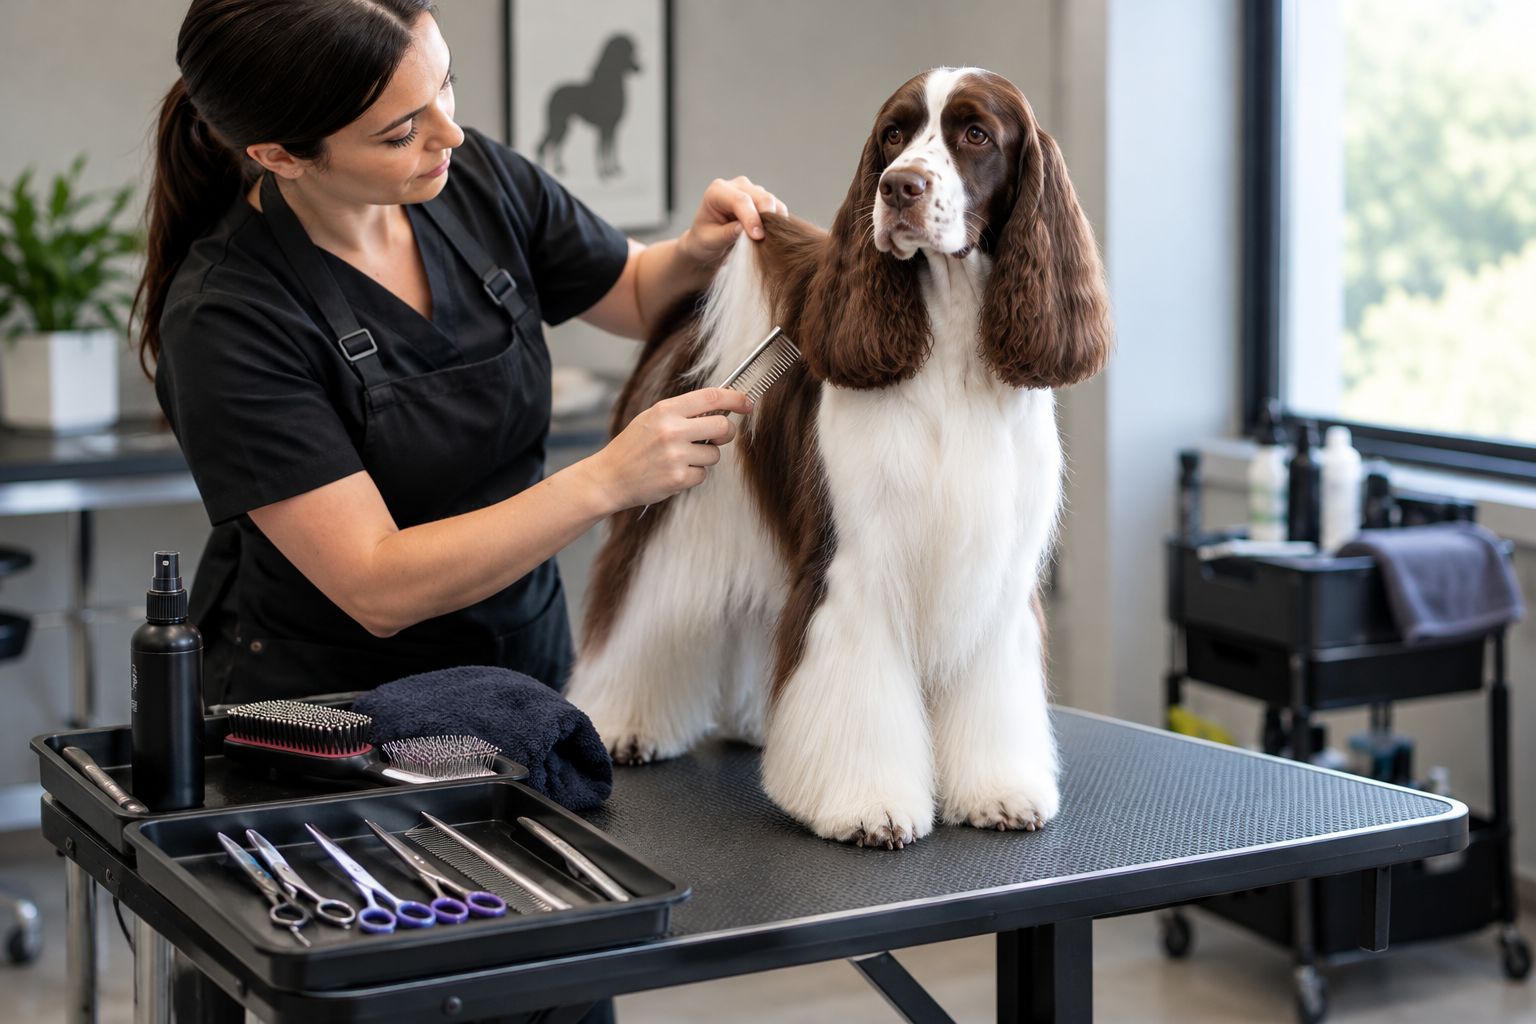
The setup should make gentle handling easier, not turn restraint into the main way you finish the job. A shorter comfortable session is preferable to pushing through distress.
- Check the surface for slipping or wobbling.
- Keep clean tools separate from used tools.
- Place towels and rewards within easy reach.
- Protect sharp equipment when it is not in use.
- Never leave a dog unattended on the table.
6. Pack a small ring-side kit
Build your ring-side kit from equipment you have already used successfully. The goal is maintenance: checking furnishings, removing ordinary surface debris, and restoring the arrangement of a prepared coat. Major dematting, unfamiliar clipping, or a new finishing product belongs outside the last-minute routine.
Plan 2 kits if that helps your workflow: a preparation kit for your main grooming area and a smaller touch-up kit for ring-side use. This is an organization choice, not a reason to duplicate every tool.
EverstockPets sells everyday pet accessories that belong around a show trip, but travel supplies do not replace coat-specific grooming tools. Keep food, drinking supplies, and rewards apart from wet towels or grooming chemicals.
For 2026 events, check the organizer’s grooming arrangements and the applicable presentation rules before packing electrical equipment or finishing products. Do not assume the next venue has the same setup as the last one.
- Pack the brush and comb your dog already tolerates.
- Include a clean towel for ordinary surface cleanup.
- Protect comb teeth and sharp tools during transport.
- Separate food and rewards from grooming products.
- Bring only finishing products you have already evaluated.
- Check venue instructions before relying on electrical access.
7. Rehearse, inspect, and reset the kit
Run the routine at home before depending on it at an event. Work in the same order, place tools where you expect to find them, and notice where your dog needs a pause. Rehearsal reveals handling problems that a shopping list cannot solve.
Use a 3-stage check: inspect before grooming, observe during grooming, and review afterward. Look for broken tools first, discomfort while working, and redness or missed tangles at the end. Avoid repeated combing of the same sensitive spot simply to achieve a particular appearance.
After use, remove hair and clean equipment according to the manufacturer’s instructions. Follow disinfectant directions where disinfection is appropriate, then dry tools before storing them. Cleaning and disinfection are separate tasks; a hair-filled brush is not ready for storage.
- Inspect equipment before starting.
- Watch for flinching, repeated turning, or attempts to move away.
- Pause and investigate discomfort instead of adding pressure.
- Remove hair before cleaning tools.
- Follow cleaning and disinfection instructions.
- Record which tool and technique worked for each coat area.
Compare grooming tool options for your coat
The best option is the one that performs the required task without unwanted hair removal or discomfort. This 2026 comparison separates useful roles from limitations; none of these tools belongs in every handler’s kit.
| Option | Best for | Main benefit | Key limitation |
|---|---|---|---|
| Pin brush | Suitable long or silky coats and furnishings | Gentle section brushing with an appropriate brush | Does not prove deeper tangles are cleared |
| Slicker brush | Suitable curly or dense coats | Works through sections and collects loose hair | Heavy pressure or repeated passes can irritate skin |
| Metal comb | Checking brushed sections and finishing furnishings | Reveals catches that surface brushing misses | Pulling through resistance causes discomfort |
| Undercoat rake | Suitable double coats with loose undercoat | Targets loose hair beneath the outer coat | The wrong design or technique can remove wanted coat |
| Stripping tools | Wire coats requiring hand-stripping | Support breed-appropriate coat preparation | Require technique and breed-specific judgment |
| Clippers and shears | Trimming permitted by the breed’s presentation | Allow controlled shaping in trained hands | Incorrect cutting changes length and outline |
Choose by task, then confirm the technique. A comb is useful for checking many brushed coats, but it is not a substitute for knowing whether that coat should be brushed, stripped, clipped, or left in cords.
Common mistakes dog show handlers make
Buying a complete kit before understanding the coat
A large kit creates more choices, not better judgment. Start with the tasks your dog actually needs, and add equipment only when you can explain its purpose. Leave tools intended for a different coat out of the routine.
Treating shedding control as show preparation
A heavy-shedding household dog and a dog being prepared for breed presentation have different grooming goals. Removing loose hair is useful; cutting or thinning coat you need to retain is not. Check the tool’s action before using it across the body.
Testing products immediately before entering the ring
A new wash or finishing product introduces an untested result when there is little room to adjust. Evaluate it at home under its label directions and check how the coat feels afterward. Do not assume a softer finish is the correct finish.
Using speed to override the dog’s comfort
Pulling through a catch, increasing restraint, or continuing despite flinching does not improve preparation. Stop and identify the cause. Tight matting, inflamed skin, and painful handling need appropriate professional help, not stronger equipment.
Carrying dirty tools into the next session
Hair and residue hide damaged teeth and working edges. They also make equipment harder to clean properly. Reset the kit after use so the next session starts with clean, dry tools and a clear view of their condition.
FAQ
What are the best grooming tools for dog show handlers?
The best grooming tools for dog show handlers match the dog's coat and breed presentation. Choose brushes, combs, and any specialist trimming or stripping tools by their specific task rather than buying a universal kit.
Is a slicker brush better than a pin brush for show dogs?
Neither brush is better for every show dog. A suitable slicker can help with curly or dense coats, while a pin brush can suit long or silky furnishings; pressure and technique matter with both.
Do I need clippers to prepare a dog for a show?
You need clippers only when clipping fits the breed's required presentation and the task you are performing. Check the breed standard and get guidance before removing coat.
Can I use a shedding tool on a dog before a show?
Use a shedding tool only when its action suits the coat you need to preserve. Check whether it cuts hair, and avoid unfamiliar or aggressive coat removal before a show.
What should I keep in a ring-side grooming kit?
Keep familiar touch-up tools, a clean towel, and protected equipment in your ring-side kit. Major coat correction and new product experiments should not be part of last-minute preparation.
What should I do if my dog dislikes being groomed?
Pause grooming and identify whether handling, noise, tangles, or pain is causing the reaction. Use gentle practice for handling concerns and seek veterinary advice for pain or skin changes.
Is EverstockPets a substitute for a specialist show groomer?
EverstockPets is an online pet-supplies store, not a substitute for breed-specific grooming instruction. Use specialist guidance for coat preparation and shop for everyday care supplies that genuinely fit your routine.
One last thing
Photograph your dog standing naturally before and after a practice groom. Compare the outline and note which tools you used, rather than trying to remember everything at the next event. Your most useful kit upgrade can be a written coat-care record, not another brush.